Turning my bathroom into a stylish retreat was a personal journey. For years, I felt trapped by its plain walls. Every morning, I dreamed of a space that inspired calm and refreshment.
When I discovered shiplap, I knew it was the answer. Shiplap adds warmth and texture, making spaces sophisticated and charming. My bathroom makeover was a fulfilling experience, turning my vision into a modern shiplap bathroom that shows my style.
Join me as I share tips and insights from my journey. I hope to inspire others to start their own transformations.
I used different materials and colors to add shiplap elegantly. From finding the right fixtures to choosing designs, every choice added to the chic vibe. With a total cost of $1,175.18, I learned that style and function can be affordable.
This journey taught me the value of preparation. It ensures my new space stays beautiful and durable for years.
Discover stylish fixtures that can enhance your bathroom makeover, just like they did mine. Explore the world of shiplap and create your own personal haven with me!
Table of Contents
Embracing the Shiplap Trend in My Bathroom
Adding shiplap to my bathroom renovation was thrilling. Shiplap brings beauty and function. Knowing what shiplap is key for anyone wanting to improve their space. It’s a wooden board with a tongue-and-groove design, ideal for bathroom walls.
What is Shiplap?
Shiplap is a wooden paneling style, often seen in coastal and farmhouse designs. It’s strong and holds tight, great for bathrooms’ humidity. You can use moisture-resistant MDF boards to avoid warping, which is important in damp places.
Why Choose Shiplap for Bathrooms?
Choosing shiplap for bathrooms has many advantages. It makes rooms look bigger, whether it’s horizontal or vertical. Plus, it keeps walls dry with water-resistant paint, which is essential in bathrooms. It’s also a budget-friendly option, offering durability and style without the trouble of tiles.
Latest Styles and Trends in Shiplap Design
Today’s shiplap trends include a variety of colors, from whites to blues and greys. Homeowners are mixing shiplap with wallpaper for bold looks, especially in small rooms. Distressed finishes add a vintage touch, while modern looks appeal to contemporary tastes. Combining shiplap with geometric tiles creates eye-catching contrasts.
Materials and Colors for Shiplap Bathroom Projects
Shiplap is a favorite for bathroom designs, adding beauty and function. Choosing the right materials and colors is key for a stylish space. There are many options to match your style and preferences.
Different Materials for Shiplap
Material choice is important for a shiplap bathroom. Traditional wood, like cedar or teak, brings classic charm. But, in humid areas, moisture-resistant options are better.
PVC and vinyl are durable and water-resistant, keeping your design intact. For those on a budget, composite shiplap materials offer a similar look at a lower cost.
Color Variations to Consider
Color can change a bathroom’s feel. White is the most common, but many colors are available. Soft pinks, dark blues, and aqua tones can add brightness or elegance.
In small bathrooms, light colors make the space seem bigger. Darker shades can add drama.
Combining Textures for a Unique Look
Adding different textures makes a bathroom more interesting. I like pairing smooth shiplap with distressed wood or natural elements. This mix creates a cozy yet stylish bath that’s uniquely yours.
Finding the Right Shiplap Product for Your Space
Choosing the right shiplap can really change how my bathroom looks and feels. It’s important to think about the size of my furniture and how the space is laid out. This way, the shiplap will fit perfectly with my design.
Using shiplap can make my bathroom look bigger. It creates an illusion of larger walls when installed well.
Understanding Furniture Dimensions and Space Planning
Before starting a shiplap project, I need to know the size of my bathroom. I have to plan where the shiplap will work best. For example, dark shiplap in a small area can make a big statement while still being elegant.
Using trendy colors like navy blue can mix modern and classic styles. This adds a special touch to my bathroom.
Choosing Between Pre-Finished and Raw Shiplap
There are pros and cons to choosing between pre-finished and raw shiplap. Pre-finished shiplap is easy to use because it’s ready to go. It saves time and keeps the area clean.
On the other hand, raw shiplap lets me pick the exact color and finish I want. This means I can make my bathroom truly unique, whether I prefer a textured look or clean panels.
Budgeting for Quality Shiplap Products
When budgeting for shiplap, I need to think about the cost of materials, installation, and upkeep. It’s smart to choose shiplap that can handle moisture, like in bathrooms. This helps avoid damage later on.
Looking for deals can help me save money. This way, I can spend on other important things for my bathroom makeover. Shopping smart for quality shiplap means my bathroom will be comfortable and look great for a long time.

Amazon Product Reviews for Shiplap Bathroom Essentials
Amazon has a wide range of shiplap products for bathroom makeovers. Each item has its own design and style, fitting different tastes. Whether you prefer rustic or modern, there’s something for everyone to refresh their bathroom.
Evaluating Design and Style
When looking at shiplap, color and texture are key. Mixing light and dark wood tones creates a balanced look. Vintage items like trough sinks add to the shiplap’s charm.
Adding greenery to white shiplap walls makes the space lively and welcoming.
Costs That Fit Various Budgets
Choosing shiplap bathroom essentials depends on your budget. Amazon offers a wide price range, fitting any budget. From affordable MDF to premium wood, there’s something for everyone without sacrificing style.
Durability and Comfort Considerations
Shiplap must be durable, especially in humid bathrooms. Reviews stress the need for moisture resistance. Quality materials ensure a long-lasting and comfortable space.
Waterborne alkyd paint finishes help protect against moisture, making your design last longer.
| Product Name | Design Style | Price Range | Durability Rating |
|---|---|---|---|
| Classic White Shiplap Board | Rustic | $$ | High |
| Reclaimed Wood Paneling | Vintage | $$$ | Medium |
| MDF Shiplap Sheets | Contemporary | $ | High |
| Decorative Sliding Barn Door | Rustic Modern | $$$ | High |
Designing My Shiplap Bathroom: Key Elements
Designing my shiplap bathroom was all about making smart choices. I picked elements that make the space both beautiful and functional. The shiplap focal point set a welcoming vibe. The color scheme and fixtures added to the look. And the right lighting made it feel cozy and inviting.
Creating a Focal Point with Shiplap
I chose to put shiplap on the bottom third of the walls. Above, I used fresh wallpaper. This combo frames the space nicely. A bold accent wall behind the new 30″ vanity really stands out.
The 7″ wide shiplap boards gave the bathroom a sleek look. It became the main attraction in the room.
Complementary Fixtures and Fittings
Choosing the right fixtures was key to tying everything together. I picked a mix of polished nickel and brushed gold. This mix worked well with the shiplap.
Stainless steel for the towel ring and brushed gold for the toilet paper holder added a modern touch. They also connected well with the shiplap.
Lighting Ideas that Enhance Shiplap Appeal
Lighting is crucial for showing off shiplap’s textures and colors. I chose pendant lights and wall sconces that brighten the room. They also highlight the shiplap’s finish.
These lighting choices create a cozy feel. They make the design modern and welcoming.
Combining Shiplap with Other Design Elements
Adding shiplap design elements to your bathroom can make it look sophisticated and welcoming. Mixing these styles creates a space that looks good and works well. I’ve found that combining textures and patterns makes the room feel balanced and beautiful.
Balancing Shiplap with Modern Accents
Modern accessories like sleek faucets and simple mirrors can really make shiplap walls stand out. This mix of old and new gives your bathroom a fresh, modern look. I chose fixtures that were clean and simple, which made the shiplap look even better.
Best Flooring Options for Shiplap Bathrooms
Finding the right flooring is key to making your bathroom look good with shiplap. Tile or luxury vinyl planks are great choices. They’re durable and look good with shiplap’s warm tones. I found that light-colored tiles or wood-inspired vinyl keep the room feeling light and airy.
Matching Accessories to Enhance the Look
Choosing the right accessories for your shiplap bathroom can really make it shine. Pick items that match the colors and materials of your shiplap. Things like towels, shower curtains, and decorations can help tie everything together. They add warmth and character to your bathroom.

Maintaining and Caring for Shiplap in the Bathroom
Keeping my bathroom chic and inviting is key. Regular care keeps the wood beautiful and lasts longer. Cleaning, handling moisture, and routine checks are crucial.
Cleaning Tips for Long-Lasting Finish
Cleaning shiplap is easy with the right method. I use 1 cup vinegar to 2 cups warm water for cleaning. It removes dirt and keeps the wood strong.
For rough-sawn surfaces, vacuuming with a brush attachment is great. It catches dust in tight spots. Smooth shiplap looks best with microfiber cloths, which trap dirt well.
Dealing with Moisture and Humidity
Moisture care is vital in bathrooms. Wood shiplap needs moisture-resistant finishes. Composite shiplap panels are great for bathrooms because they don’t warp or swell.
Regular checks and sealing products keep the wood safe and looking good.
Regular Maintenance for Longevity
Regular maintenance makes a big difference. I watch for wear and moisture damage. This keeps my bathroom looking great.
Design ideas like floating vanities add to the look. But, don’t forget to keep up with maintenance to avoid problems.
DIY vs. Professional Installation: What I Chose
Choosing between DIY shiplap installation and professional services is key in any bathroom renovation. I looked at the pros and cons of each. DIY can save money and let you add your personal touch, but it’s tough in complex areas like bathrooms. On the other hand, hiring a pro ensures a smooth finish but costs more.
Since bathrooms are hard to renovate, planning is crucial, no matter your choice.
Pros and Cons of DIY Shiplap
DIY projects have their ups and downs. The cost for a DIY bathroom renovation is about $75 per square foot, which is cheap. I liked being able to add my own style. But, DIY takes a lot of time, especially with a busy schedule.
Some tasks, like electrical work, are better left to pros for safety. DIY can save money, which you can use for better materials or fixtures.
When to Hire a Professional
Knowing when to hire a pro is important. Professional work can cost up to $250 per square foot for quality and skill. If my project had many complex parts, hiring a pro saved time and made it safer, especially in a small bathroom.
Before choosing a contractor, check their references and look at their past work.
Tips for a Smooth Installation Process
Some tips are the same, whether you DIY or hire a pro. Planning is key, like acclimating wood to your home’s temperature. Applying primer as a moisture barrier is crucial in bathrooms. Use construction adhesive and finishing nails for durability.
Finally, sand and fill nail holes for a smooth finish that improves your design.
Personalizing My Shiplap Bathroom
Turning my bathroom into a special place means adding things that show my style and make it useful. Using shiplap decor ideas lets me add character with various items, accessories, and custom shelves. Each piece I choose helps make my bathroom feel welcoming and truly my own.
Incorporating Unique Decor
Unique decor, like vintage mirrors or handmade wall art, can make my shiplap bathroom look amazing. I pick items that match my taste and look good with the wood’s natural warmth. Shiplap walls are perfect for showing off these creative pieces, making them pop in my space.
Adding Personal Touches Through Accessories
Accessories are key to making my bathroom personal. Things like colorful towels, decorative soap dishes, and stylish containers make it both useful and pretty. I like mixing textures and colors to add interest, making sure it reflects my taste while staying cohesive.
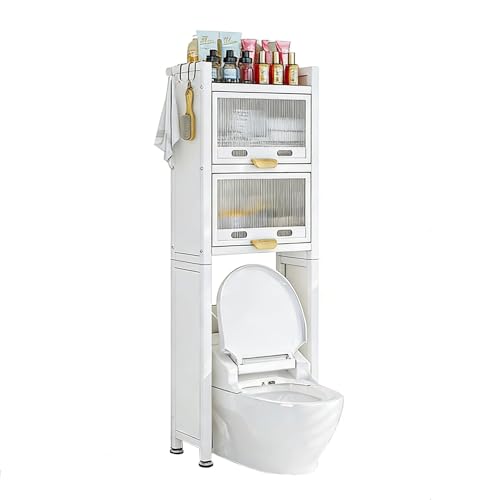
Customizing Shelving and Storage
Custom shiplap shelves can really help with storage and make my bathroom look better. They let me keep things organized and show off decorative items, using space wisely. The rustic look of shiplap with useful storage makes my bathroom feel especially welcoming.
Budget-Friendly Shiplap Ideas for Any Home
Turning a bathroom into a stylish space with shiplap is affordable. Using MDF or plywood keeps costs down while adding style. I’ve found many budget-friendly shiplap ideas that are both beautiful and budget-friendly.
With smart planning and a focus on value, you can create a stunning look. This look will reflect your personal style without breaking the bank.
Cost-Effective Alternatives to Traditional Shiplap
Plywood strips are a great choice for those on a budget. They cost less than traditional shiplap and are easier to install. Plywood boards that are ¼” thick are lighter and simpler to handle than the ¾” boards.
Using plywood sheets can save you money while still giving you the look you want.
Tips for Finding Deals on Bathroom Materials
Look for deals at local flea markets, clearance aisles, and online. Keep an eye out for sales to find great prices on what you need. I check hardware stores for discounts on bulk purchases or special offers.
Many stores offer lower prices on shiplap materials if you buy a lot at once.
Maximizing Impact on a Limited Budget
Even with a small budget, you can make a big impact with shiplap. Plan your layout and where to place the boards carefully. Using consistent heights and spacing with nickels can make it look polished.
Using a nail gun and Bondo putty to fill seams can improve the finish without costing much. It makes the shiplap look durable and attractive.
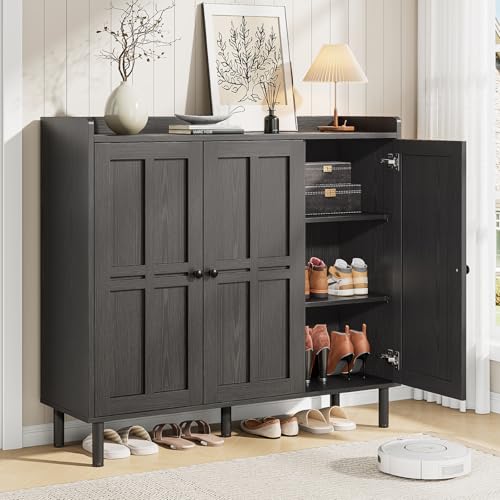
Trending Accessories to Pair with Shiplap
Choosing the right accessories is key to a stylish shiplap bathroom. Well-chosen shiplap accessories can really make a space pop. Stylish mirrors, lighting, and textiles add a nice touch, balancing with the shiplap’s charm.
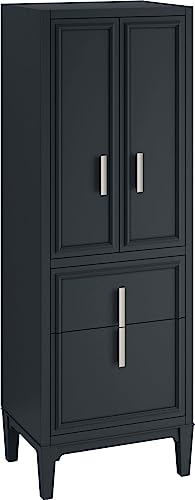
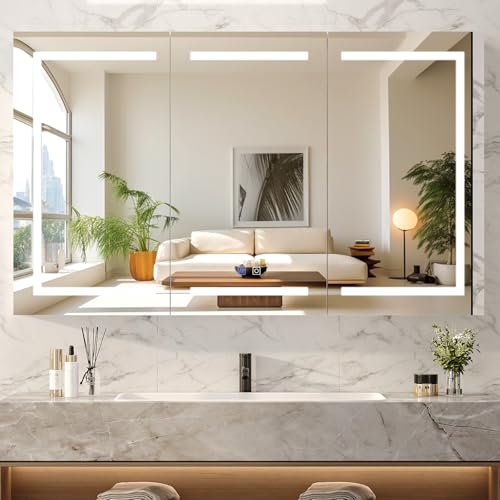
Stylish Mirrors and Vanities
Stylish mirrors are a must for any shiplap bathroom. Whether it’s a vintage round mirror or a sleek modern design, the right choice adds sophistication and depth. For inspiration, check out these great bathroom mirrors that can complement any shiplap finish. Pairing mirrors with unique vanities, particularly those in natural wood or painted finishes, creates a cohesive look that stands out.
Choosing the Right Lighting Fixtures
Lighting is crucial in setting the mood of a bathroom. Stylish lighting fixtures, such as chic sconces or elegant pendant lights, provide both functionality and an opportunity to showcase my design style. I’ve opted for warm-toned bulbs that provide inviting light, ensuring the bathroom feels both cozy and luxurious. Selecting fixtures that match the shiplap tones, whether white or darker stained wood, helps maintain a cohesive bathroom decor trend.
Bathroom Textiles That Elevate the Design
Incorporating quality textiles is another effortless way to enhance the look of a shiplap bathroom. Luxurious towels, plush rugs, and unique shower curtains introduce layers of texture. I prefer neutral tones or muted patterns that complement the rustic charm of shiplap while adding a touch of warmth. With the right textiles, I can seamlessly tie together the design elements, making the space feel complete and inviting.
My Favorite Color Palettes for Shiplap Bathrooms
Choosing the right shiplap color palettes can change a bathroom’s feel. Soft neutrals create calm atmospheres in bathrooms. Tones like off-white and pale gray make spaces feel open and welcoming.
Bold shiplap colors, like deep blues and rich greens, add energy. Mixing these styles lets you express yourself and be versatile.
Soft Neutrals for a Calm Ambience
Soft neutrals are popular for their calming effect. Colors like light beige, soft white, and pastels create a peaceful background. They’re perfect for relaxation.
Colors like Snowbound by Sherwin-Williams and White Dove by Benjamin Moore work well. Adding accessories can make the space elegant and composed.
Bold Colors That Make a Statement
Bold shiplap colors, like navy or forest green, add drama. Inspired by modern trends, bright colors like oranges and blues are eye-catching. Jewel tones or deep teals can also enhance the look against lighter surfaces.
Incorporating Seasonal Colors into Decor
Seasonal decor lets me change colors without a permanent scheme. In spring, I use soft pastels and floral colors for warmth. Summer brings brighter tones to uplift the space.
Using accessories or seasonal decor keeps bathrooms vibrant and inviting all year.

Future Trends in Shiplap Bathroom Designs
Bathroom design is changing, and shiplap is leading the way. New trends in shiplap are exciting and focus on being green and useful. People want their bathrooms to be both stylish and good for the planet.
Using natural wood is becoming more popular. It looks great and is better for the environment. This choice is a win-win for both style and sustainability.
Eco-Friendly Materials Gaining Popularity
More people want eco-friendly materials in their bathrooms. Woods like cedar and pine are in demand. They look good and can handle moisture well.
Choosing these materials makes me feel good about my choices. It’s a step towards a greener home.
Innovations in Shiplap Installation Methods
New ways to install shiplap are making DIY projects easier. Snap-together systems and pre-finished options are available. They make the process faster and less prone to mistakes.
This means I can achieve a professional look without needing a contractor. It’s a big plus for DIY fans like me.
The Rise of Multifunctional Bathroom Spaces
Bathrooms are becoming more than just a place to bathe. Shiplap helps create spaces that are both beautiful and practical. It’s all about making the most of every inch.
Think of shelves that also serve as decor, or vanities with hidden storage. It’s all about keeping things organized and stylish. I dream of a bathroom that’s both relaxing and functional.
The Ultimate Guide to Shiplap Bathroom Makeover
Starting a shiplap bathroom makeover needs careful planning for amazing results. This guide walks you through the steps, from moisture precautions to measuring right. I spent about $70, mainly on plywood at $24 per board, cut into strips.
Having a solid plan, I did most of the work alone in two days. I used nickels for even spacing, saving 50 cents.
A Step-by-Step Process to Follow
The installation is simple but needs focus on details. I applied primer to seal the boards first, key for bathroom moisture control. I used construction adhesive, finishing nails, and tongue and groove fitting for a tight fit.
Primer helped avoid brush strokes, making the job quicker. Knowing common mistakes, like skipping moisture protection, helped me avoid issues.
Common Mistakes to Avoid
Don’t underestimate material needs; buy 10-15% more. Thicker plywood reduces chipping, giving a smoother finish. After two coats of Valspar “Ultra White” paint, my bathroom was bright and welcoming.
Final Thoughts on Shiplap Style and Function
My shiplap makeover updated and personalized my bathroom. Shiplap is cost-effective and hides imperfections, making it great for renovations. For a modern look, try vertical shiplap for an airy feel.
Shiplap’s growing popularity in design adds style and keeps function. It’s a smart choice for any bathroom update.